Navigation Design
The core areas of the design of game UX are Menu Design, HUD Design, and Presentation. However, the design of game UX starts with Navigation Design: identifying menus and core features and arranging them as a flowchart. Navigation Design has also been referred to as Information Architecture, Interaction Architecture, and UI Map.
After you define the navigation and core features, follow best practices in each core area to identify what needs to be fleshed out and redesigned before full production.
UI Map
The UI Map helps the designers and engineers understand the navigation path and potential roadblocks within the menu design. Every menu has a list of options, which usually point to another menu or input decision. All options, features, input requirements, and notifications are documented in the UI Map.
How is the UI Map used?
UX designers and engineers use a UI Map to understand and quantify the work needed to create a functional menu system within a product. Use the UI Map to track and adjust navigation of the menus and to identify the menus that can be optimized for development and production.
The more detailed and interactive a UI Map you create, the more it will help you anticipate and solve problems with flow and messaging—not just before but also during production, should you decide to add features.
Get all stakeholders on board
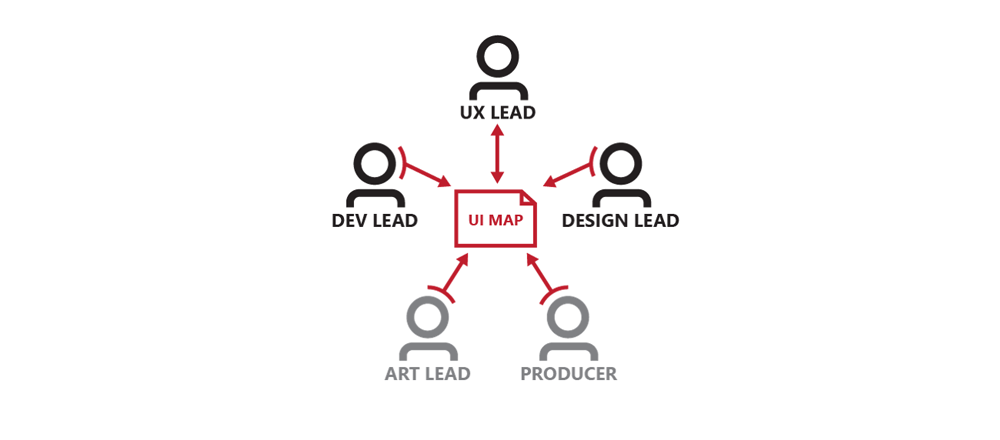
It is very important to create a UI Map in the very early stages of a product’s development. After core features have been identified, the next step is to create a UI Map. This should involve the UX Lead, Design Lead, and Engineering Lead.
As soon as the UI Map contains all menu areas, discuss the flow’s scope with the Art Director and Art Producer. Get all the lead stakeholders of the project involved early and use the UI Map stage to communicate the technical, feature-related, and artistic changes that might be required during production.
Use the UI Map to help all disciplines understand the scope and design of the project throughout production. Update the UI Map with every change made, and have the leads and producers update it with production deadlines, budgeting, and staffing.
Levels of detail
Before diving deep into the details, think of the UI Map as a painting. Start with a high-level sketch, and work in the details as you refine the UI Map with the lead stakeholders.
Make the first version of the UI map high level and use it to record all the design features exposed in the interface with the user. Make each menu high level enough to record each interaction as a new menu or notification and to easily show how the user can navigate the menu.
Make the second version of the UI Map a detailed listing of options and features within each menu screen. This will help determine the template patterns and reuse of components. This level of detail will also help with engineering, design, and production.
The third version is optional. It is used to demonstrate the menus and features and to create an interactive walkthrough prototype before production begins.
Navigation
Minimize the effort needed to navigate to areas within the UI flow. Consider incorporating shortcuts for circumnavigating an entire menu section.
Use the UI Map to estimate the number of the screens the player must move through to complete an action. Make the most important actions accessible quickly, from a central location, and move the more complex actions deeper in the flow.
Avoid having too many entries and exit points on the same screen. It is tempting to provide as many shortcuts between screens as possible; however, too much redundancy might prevent players from developing a consistent mental model of the UI flow. In other words, if your UI Map looks like a rat’s nest, the UI will feel like one.
Architecture of interaction
The A and B buttons are the standard input for interacting with menus in a video game. Use the A button to enter or select a menu, and the B button to cancel or back out of a menu. If any special buttons are used, call them out on the screen.
Best Practice: Design the UI flow such that the A button is all that a player needs to navigate through the menus and get into the game. This will reduce the effort and make the game accessible to all users.
Review the entire UI Map to ensure that the same buttons are used to perform the same types of action. For example, don’t use the left and right bumpers to tab through a list on one screen but the left and right triggers to tab on another screen.
Examples
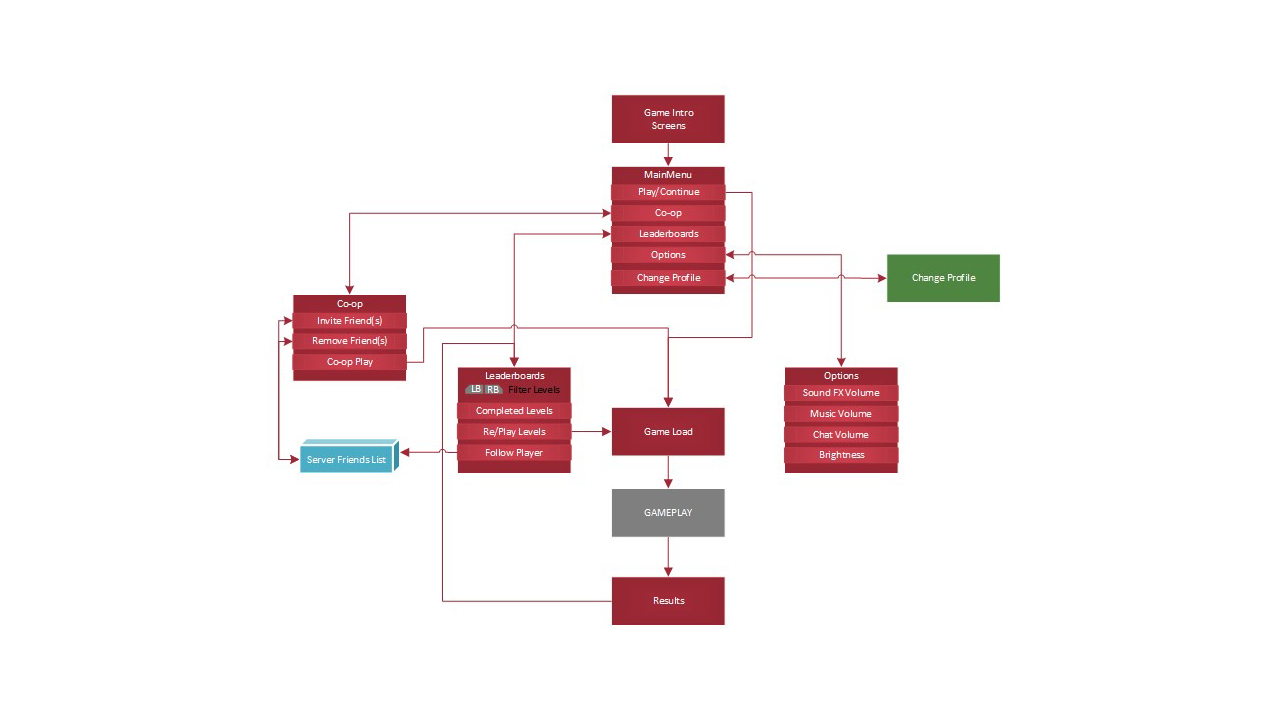
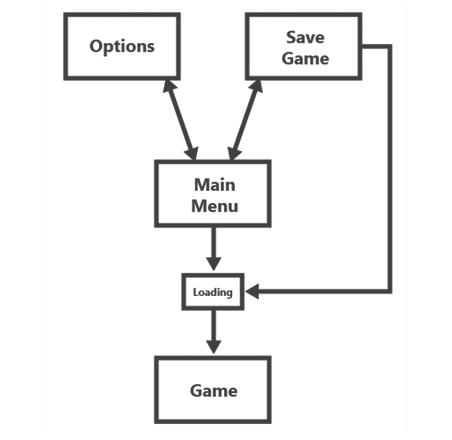
Basic UI Map showing a menu flow
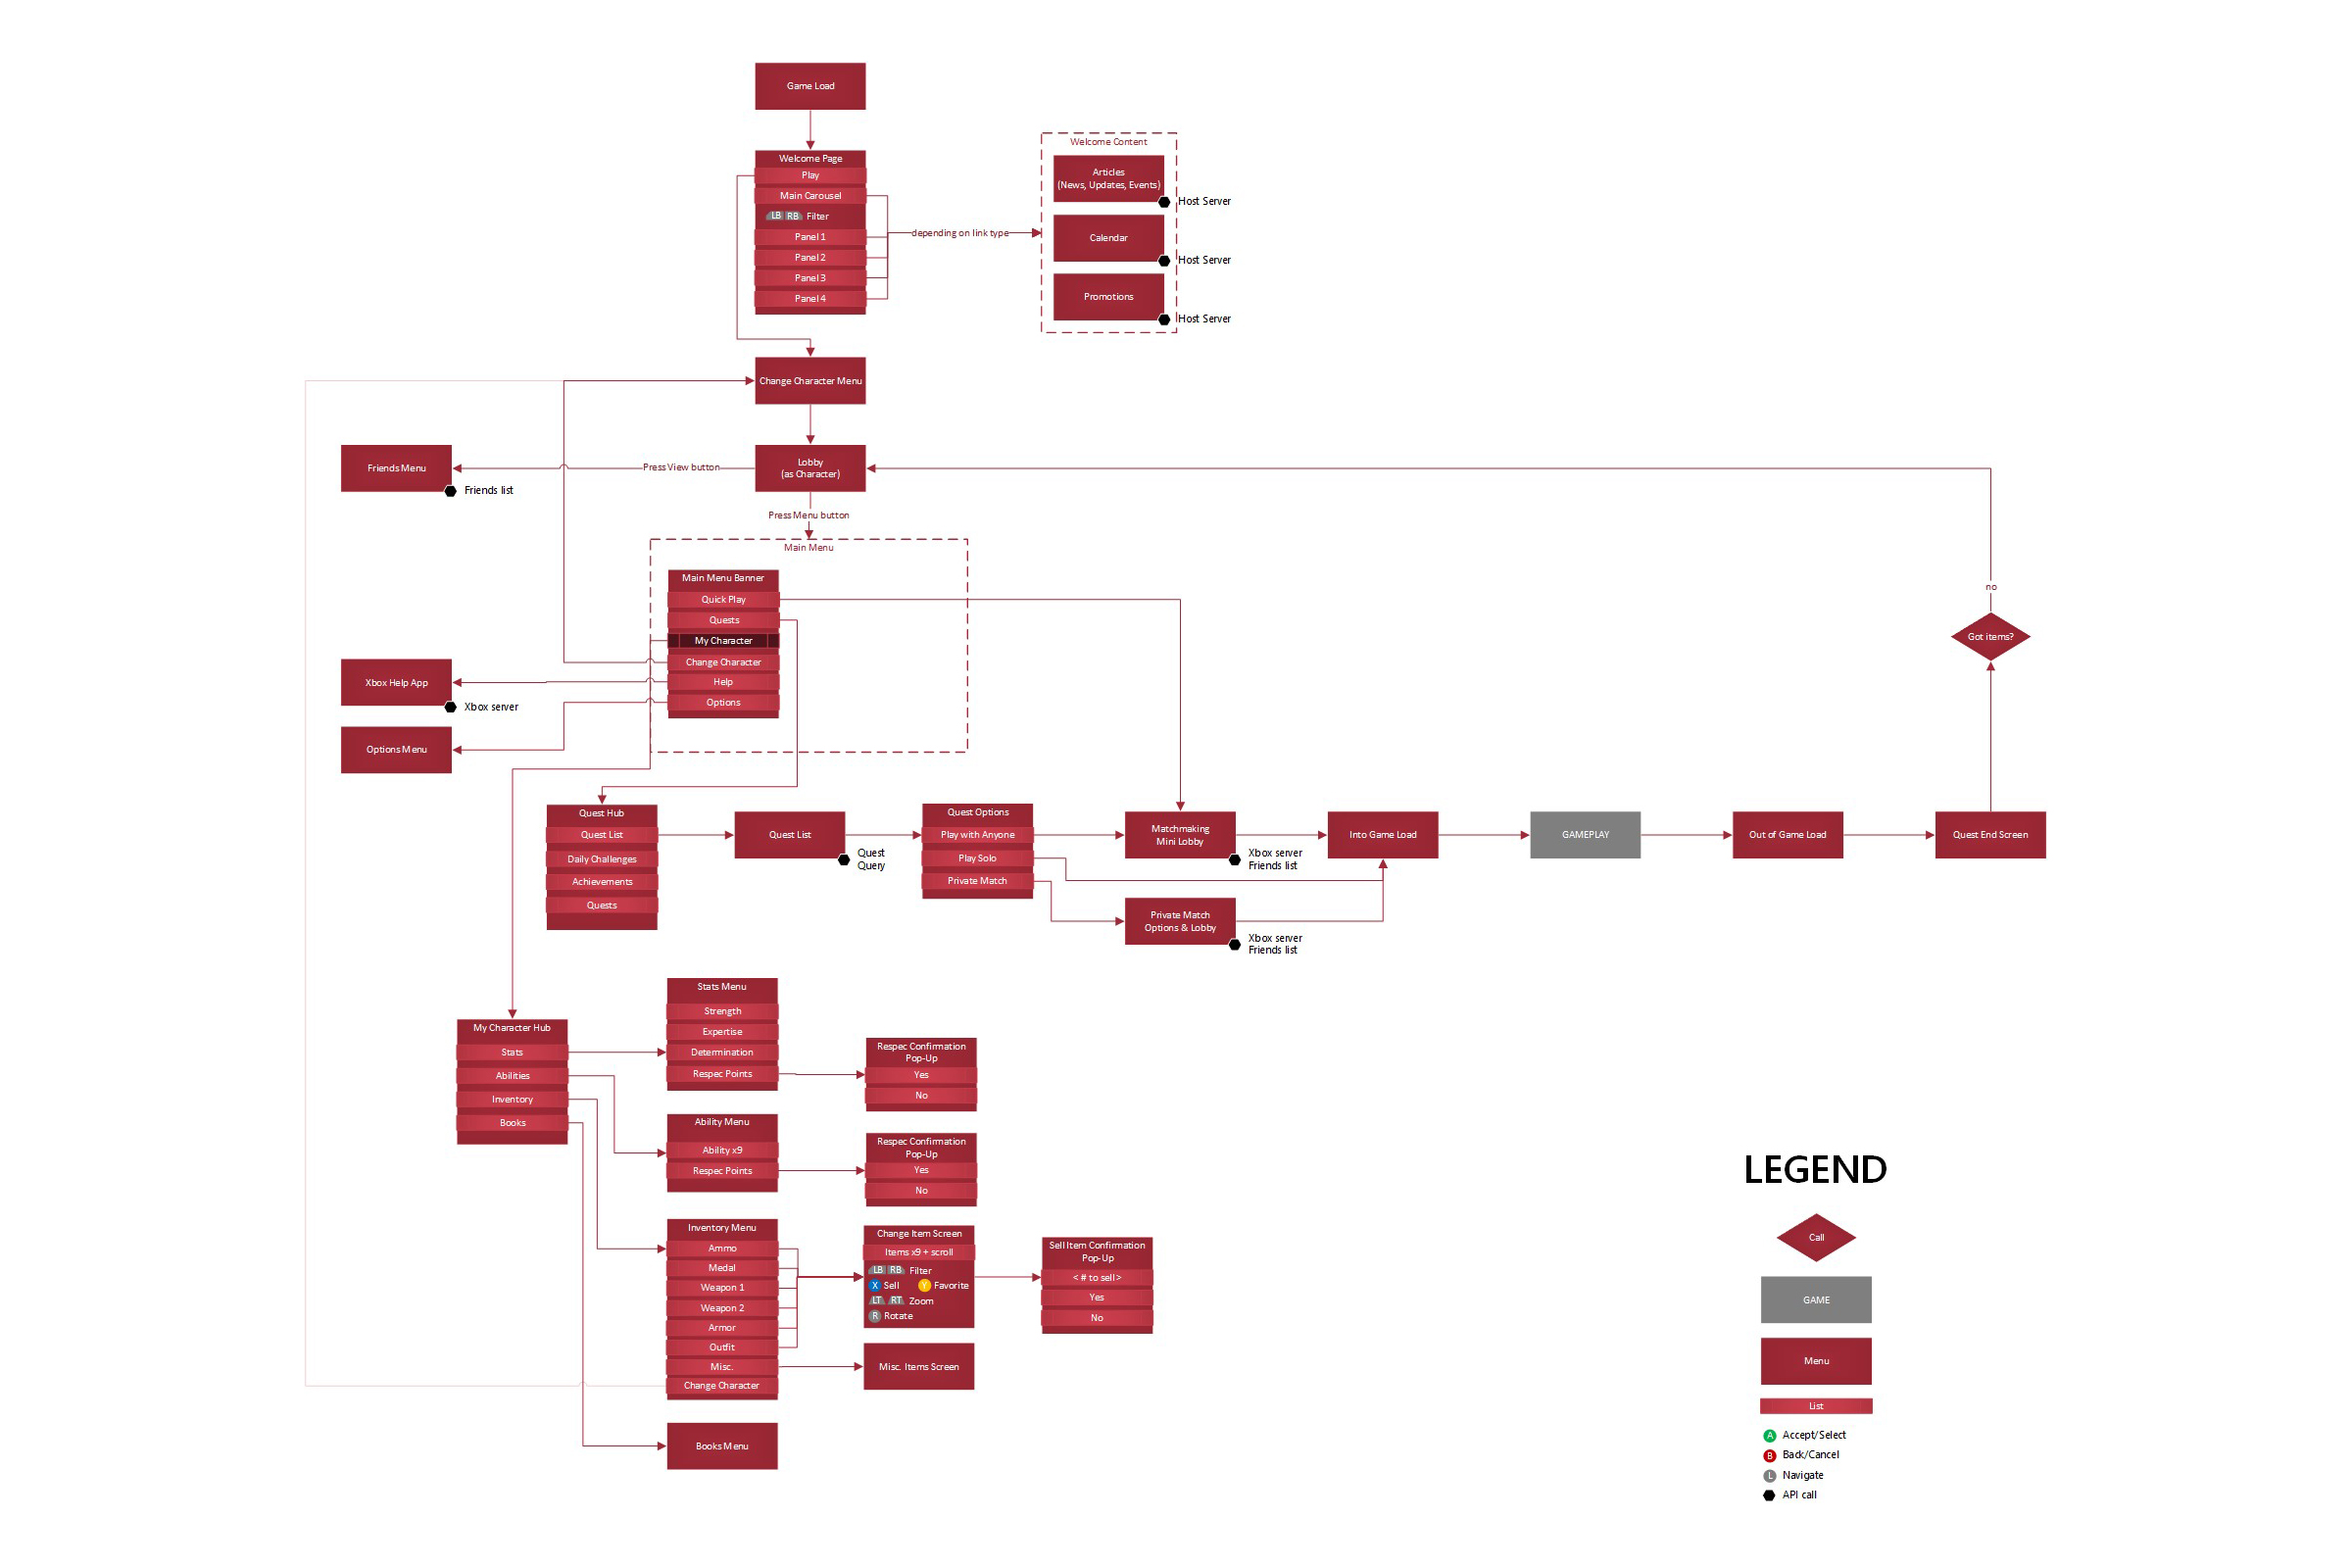
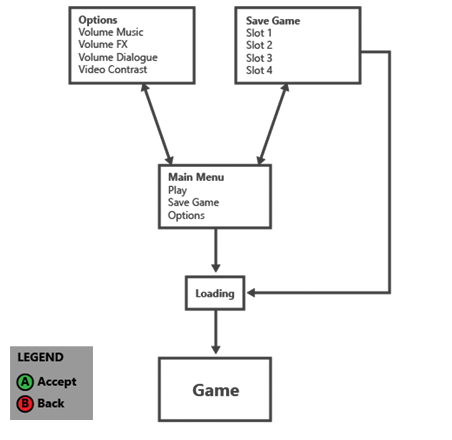
Detailed UI Map with a legend
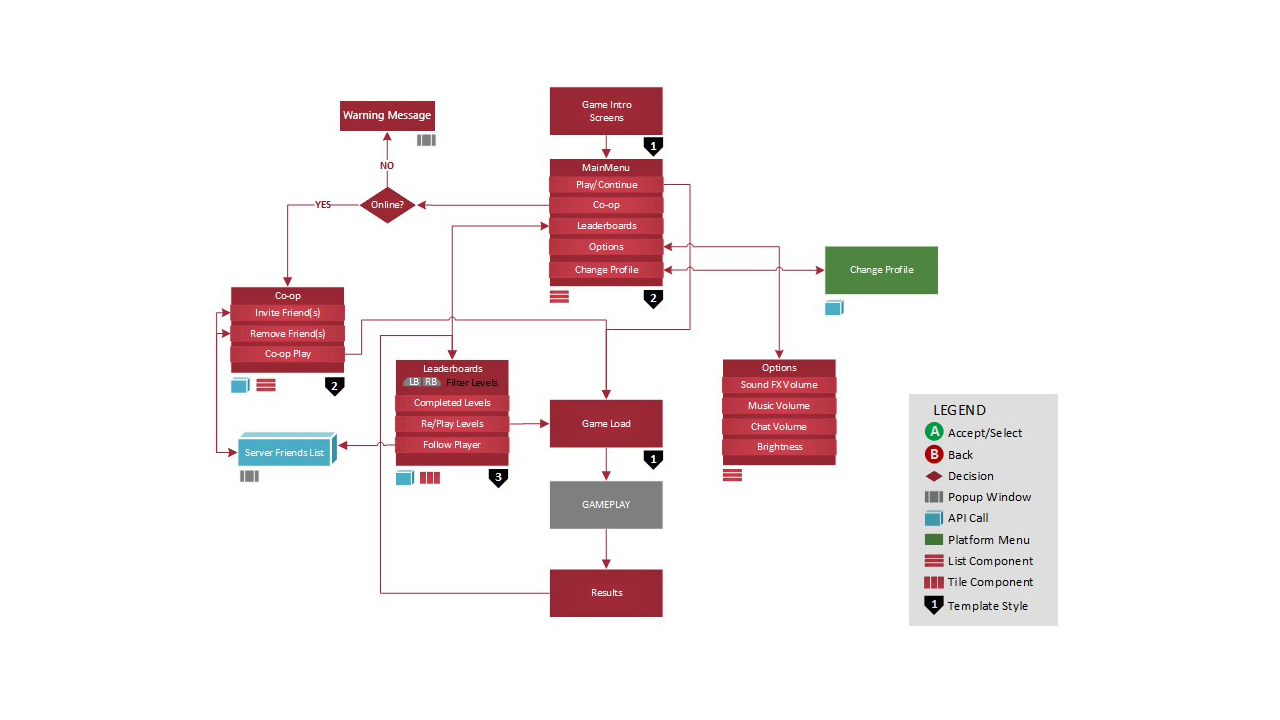
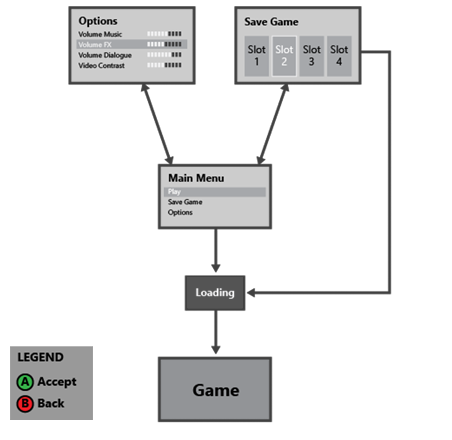
Detailed UI Map with a legend that shows the templates, components, and API calls